

How To Make An Encrypted Login And Register System In Js
Build a Login System in Node.js
How to use Passport.js for user authentication in your node app

Yous're a talented spider web programmer in extremely high demand. Fourth dimension and time again, you've proven yourself capable of building extremely circuitous apps with large success.
Let's starting time with an example. A local school desires its students to view their bookish progress and homework correct from an app. Due to your glowing recommendations, naturally, the school department hires you lot. These are their requirements:
- Students first log in to the app using their email and required credentials. If an existing account is not found, they are prompted to create an account.
- If an existing business relationship is constitute, the student can now view their academic progress and homework.
- A logout option is too provided and so that the educatee can sign out from the app if they are using a public computer.
- The student cannot access the dashboard unless they are logged in.
This tutorial will exist focusing on the login and logout organization portion of the website. This is chosen user authentication. If you're using JavaScript, a library called Passport.js tin can be used for user authentication. Passport.js is essentially middleware used for authentication in Node.Js.
This is your objective as it meets the requirements of the client:
Get Started
Before typing whatsoever code, first install the following modules:
-
limitedfor treatment your routes -
express-sessionfor building a user session -
express-ejs-layoutslayout support forejsin Express -
connect-flashwill be used to brandish wink messages. We will cover more on this afterwards. -
passportto handle user authentication -
passport-local, which is a strategy(authentication mechanism) with a username and password -
mongoosefor storing users in the database -
bcryptfor encrypting your passwords earlier y'all store them in your database. Information technology'due south a necessity to never store passwords in obviously text for obvious security reasons. -
ejsmodule to send information from Limited toejsfiles
This is the command you should run:
npm i limited limited-session limited-ejs-layouts connect-flash passport passport-local mongoose bcrypt ejs When that's done, follow the further steps listed below for the initial stages.
The index.js route
Create a folder in your projection directory with the proper name of route. Here, create a JavaScript file called index.js. In the end, the location of index.js
volition be at routes/index.js.
In routes/alphabetize.js, write the post-obit code:
-
line four: When the user navigates to therootdirectory (performs aGorequest) render thewelcome.ejspage. -
line 8: When the user does aGetrequest to theregisterpage, render theregister.ejspage. -
line 12: Export the router instance and then that it can exist used in other files.
The users.js route
Go to your routes binder and create a file called users.js such that the users.js location is routes/users.js.
In routes/users.js,
-
Lines five to nine: Handle the respectiveGorequests and return the advisable pages -
Lines 12 to 14: Handle the correspondingPOSTrequests. They will be filled in afterward on in this tutorial.
app.js
This will be your main file. In your root directory, create a file called app.js. Here, write the following code:
-
line 11: Tells Limited that you lot volition be usingejsas your template engine
Now that you have divers your routes, let's create the ejs files that will be rendered to the screen.
Create a views folder in your root directory and write the following files. These are standard, static ejs files. Yous tin can detect the explanations for the code in the EJS documentation website.
layout.ejs
In views/layout.ejs:
            <html>
<caput>
<title>Node.Js and Passport App</championship>
</caput>
<trunk>
<%- body %>
</body>
</html>
annals.ejs
welcome.ejs
            <html>
<h1>Welcome!</h1>
<p>Create an business relationship or login</p>
<a href="/users/annals">Register</a>
<a href="/users/login"> Login</a>
</html>
login.ejs
Notation: You take used the name attributes for the elements in the course as y'all will extract the values in the form by identifying each element by name.
To run this code, go to the command line to run the app.js file.
node app Go to localhost:3000 and you volition find your output to be identical to this:
Y'all have finally completed your starting time stages. Information technology's now time to use Mongoose to relieve your users in your database.
Salvage Users to Database
The user schema and model
As usual, you have to define a schema earlier creating documents and saving them to the database. First, create the models directory and there create a file called user.js such that it is models/user.js. Showtime, allow'due south create a schema in user.js. Next, we'll create a model from that schema.
In models/user.js:
This ways that your model will have a name, an email, its associated password, and the date of creation.
On line 20 , we're using that schema in your User model. All of your users will have the data in this format.
Handling the Mail service request to the annals directory: validation checks
In this step, you will create a document in the MongoDB database with the client-provided information.
At the starting time of the routes/users.js file, import the Mongoose library, and import the User model that yous simply created.
const User = crave("../models/user.js") Now, in the routes/users.js file, find the following piece of lawmaking:

Within this handle, write the following code:
-
Line 1: Extract the values from the elements in the form. You are taking out the email, the name of the user, his password. The concluding field (password2) is a validation check to ensure that the user has confirmed that the password they are typing is correct. -
Lines 4-six: If any of the fields has non been filled, add an appropriate bulletin to theerrorassortment. -
Lines 8–10: If the passwords don't match, add the appropriate message to theerrorassortment. -
Lines 13–fifteen: Check whether the countersign has a minimum of vi characters. -
Lines 16–23: If any content within theerrorarray is present, re-render theregister.ejsfolio then send the advisable information along with theerrorsarray. All of the contents of this assortment volition be displayed on the folio. -
Lines 24–36: You have successfully passed the validation! Now you lot will commencement find if at that place is already a user present in the database via the email. If in that location is, and so you will re-render theregister.ejspage and display the relevant mistake. Otherwise, create a new user with the provided email, name, and its associated password. Carry in heed that you haven't saved it however. Y'all will save it afterward encrypting the countersign.
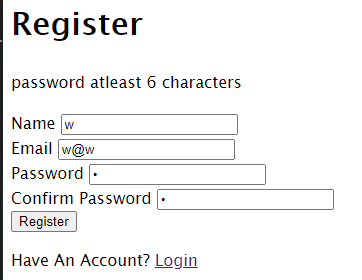
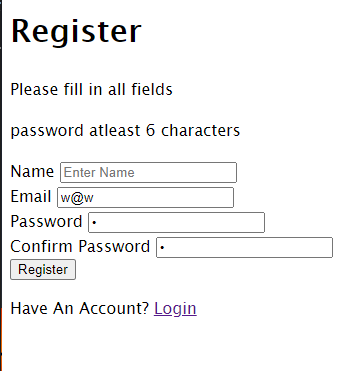
As an instance, permit's run the code and enter a single-character password so that it re-renders the page:
You now need to display the errors, that is, display the contents of the errors array.
Brandish the errors
Now go to views/register.ejs and observe the following piece of code (this will be around the beginning of the file):

When you've found it, write the following line just under this h1 tag:
<%- include ('./partials/messages') %> This line means import a new file that volition help brandish the messages.
Go to your views directory, create a new directory chosen partials, and within partials, create a file called letters.ejs. In that location, write the following code.
views/partials/letters.ejs
            <% if(typeof errors!= 'undefined') { %>
<%    errors.forEach(office(error){ %>
<p> <%= error.msg %></p>
<%    })        %>
<% } %>
This code says that if at that place are any errors present, then display the contents of the array with its own paragraph(p) chemical element.
Re-run the code and write a single grapheme password. This will be the output:
If y'all exit any of the fields empty, then you will become this error message:
Make both password fields contain different values:

Treatment POST requests to the register: save the users to the database
In this step, you will save the registered users to the MongoDB database. You volition beginning encrypt their passwords and then salvage them to the database.
In routes/users.js, find the following slice of code:

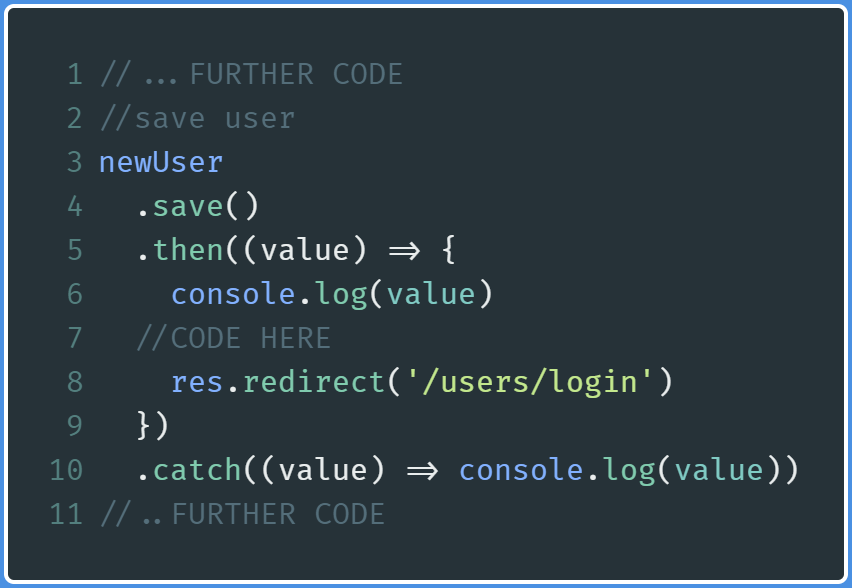
Within this else cake, write the following slice of code:
And on that note, terminate the else statement here.
-
Lines two–7: Generate a common salt, hash the user's password. Assign this encrypted value to the user's password and so salvage the client to the database. -
Line 10: When the certificate is saved without errors, and then redirect the user to thelogindirectory, where the user will at present log in with their credentials.
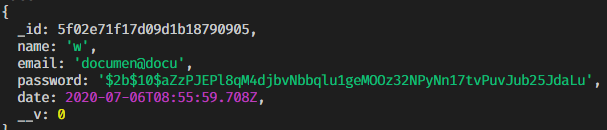
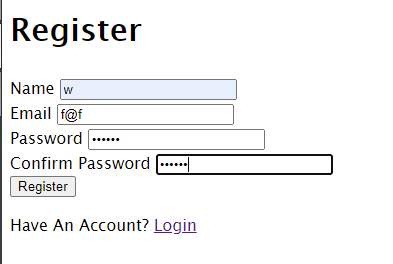
This will be the output of the code when you annals yourself as a user:
Since y'all have logged out the contents of the document in your console, hither'south the output in the console:
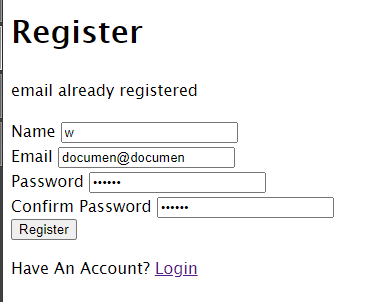
Enter a registered email. Every bit expected, you get an error telling y'all that the electronic mail has already been stored:
With this step, y'all've finally saved users to the database. Allow'due south motion on to creating flash messages with Express.
At the end of this department, this is what your lawmaking looks like:
Flash Messaging With Limited
When you annals an business relationship on a website, notice information technology redirects you to the login folio, along with displaying a success message indicating that you've successfully logged in. That success message is called a flash message.
In this section, we'll create a flash message.
Before moving on, kickoff by importing the following two libraries within app.js.
            const session = require('limited-session');
const flash = require('connect-flash');
Success wink message
You volition brandish this message when the user has registered so is redirected to the login page.
Get to app.js in your project directory and find the following lines of code:
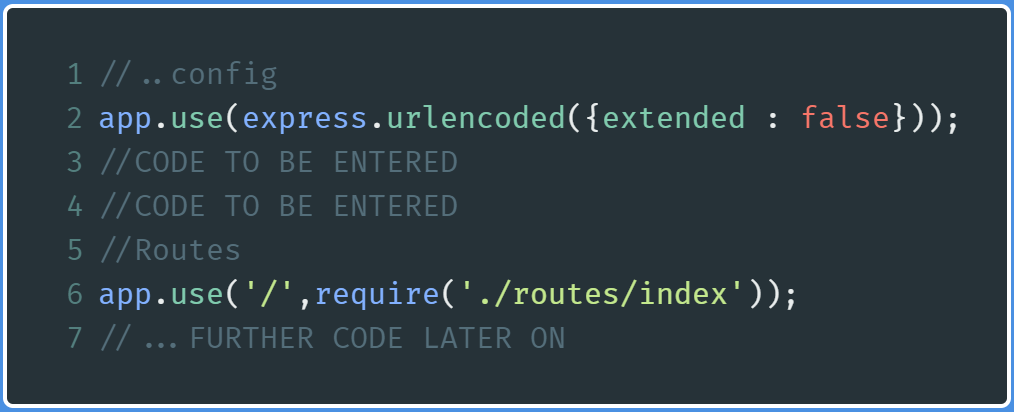
Where CODE TO BE ENTERED is written, write the post-obit code:
This piece of code basically now allows yous to employ flash messages within your app.
Now go to routes/users.js and find the following lines of code:
Where Lawmaking Here is written ( line 7) write the following line of lawmaking:
req.flash('success_msg','Y'all take at present registered!') Yous are not washed notwithstanding, though. Go to views/login.ejs and observe this piece of code. It's located only at the starting of the file.

Just after this line, blazon this line:
<%- include ('./partials/messages') %> You have at present imported your messages file to display the bulletin in your login directory.
Go to views/partials/messages.ejs and append these lines at the cease:
<% if(success_msg!= '') { %>
<p><%=success_msg %> </p>
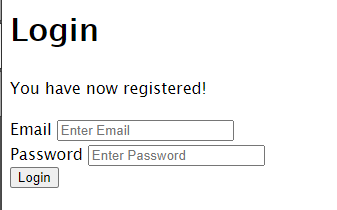
<% } %> This is the output of the code:
Mistake flash messages
For now, you will likewise implement an error flash message. Information technology will be displayed during user hallmark when an error occurs.
Go to views/partials/messages.ejs and so append the following code at the stop of the file:
            <% if(error_msg != '') { %>
              <%= error_msg %>
<% } %>
<% if(mistake != '') { %>
              <%= error %>
<% } %>
Allow's now move on with user authentication past bringing in the Passport.js framework
User Authentication With Passport
LocalStrategy
Create a file /config/passport.js and then commencement past importing the post-obit libraries:
            const LocalStrategy = require('passport-local').Strategy;
const bcrypt = crave('bcrypt');
const User = require("../models/user");
Yous are now importing passport-local with its Strategy example for a user authentication mechanism with a simple username and password. Since you will be comparing passwords this time, you need to decrypt the password that was returned by the database. For this reason, you will too bring in bcrypt. Furthermore, since you are essentially comparing passwords returned from the database, you will import User model for database-related operations.
Further on, type the following lawmaking:
-
Line 2: Configure thepassportcase such that information technology will be using theLocalStrategystrategy. You have to specify theusernameFieldoption, as this selection will be used to identify the email address that will be compared against the database. Yous take identified with this option that you will be using theemail input typeelement in the form. You lot can specify thepasswordFieldselection every bit well. However, by default, it ispassword, so you lot don't demand to specify it here. -
Lines v–24: First, find whether the given email address is present in the database. If it is not, it'll throw an error that the e-mail isn't recognized. Later on, you then compare whether the user-entered countersign matches the password in the database. If it does, it will render the relevant user data. -
Lines 25–34: In guild to back up login sessions,passportwill use theserializeanddeserializemethods on theuserinstances to and from the session.
Handling the Mail service request to the login directory
You at present demand to tell Passport where you lot want to apply user hallmark. You lot will employ this authentication mechanism on the login page.
Go to /routes/users.js and notice the following piece of code:
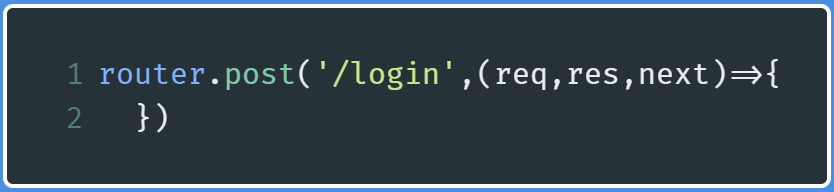
Inside this POST handler, write the following lines of code:
            passport.cosign('local',{
successRedirect : '/dashboard',
failureRedirect : '/users/login',
failureFlash : truthful,
})(req,res,next);
This means:
- If the user has successfully logged in, they volition be redirected to the
dashboarddirectory (successRedirect). - If the user does not log in successfully, redirect them to the
logindirectory (failureRedirect). - Become flash messages when an mistake occurs (
failureFlash).
Now go to app.js and start by importing the passport library:
const passport = crave('passport'); Then assign this the LocalStrategy configuration you created earlier. Exercise this pace merely after the imports:
require("./config/passport")(passport) At present, notice the post-obit lines of code:

At the comment CODE TO COME Hither (line 7) write the following code:
            app.utilise(passport.initialize());
app.use(passport.session());
You tin can now utilise user authentication functionality in your app. Nevertheless, you are not washed however. You nevertheless need to handle the redirect to the dashboard directory.
Get to /routes/index.js and type the following code:
            router.get('/dashboard',(req,res)=>{
res.return('dashboard');
})
Now run the code and go to localhost:3000/users/login. This will be the output:
Notice that you can finally log in. This indicates successful user authentication.
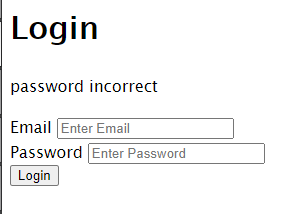
Entering the wrong password gives yous this:
You can endeavour entering an email that's not registered to receive the appropriate error message.
Permit's now move on to brandish user data.
Render the Dashboard to Display User Data
You're about done!
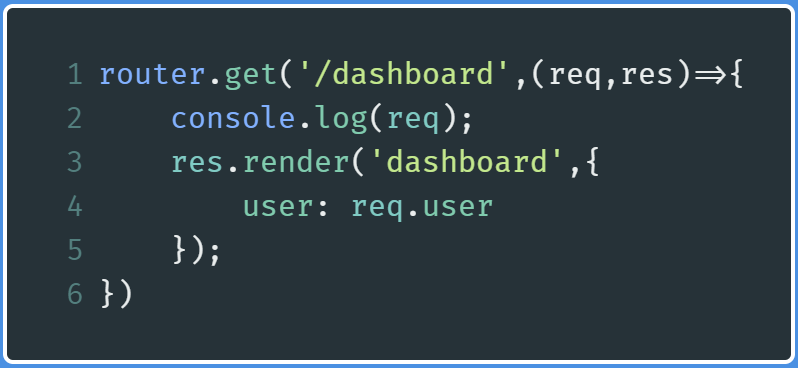
Go to /routes/index.js and find the following piece of lawmaking:

Replace the res.render method every bit follows:
            res.return('dashboard',{
user: req.user
});
Y'all've now sent the user information data to the web page. This user information data is returned by Passport.
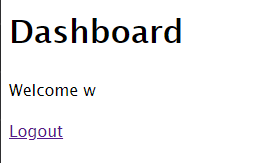
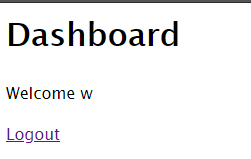
Then get to /views/dashboard.ejs and alter the Welcome message like so:
<p> Welcome <%= user.name %></p> You are displaying the name field from the user information of the logged-in user.
If you log in with the correct credentials, this is the output:
Handling Logout Requests
This is your last step, and the easiest i.
Get to /routes/users.js and discover the following piece of code:
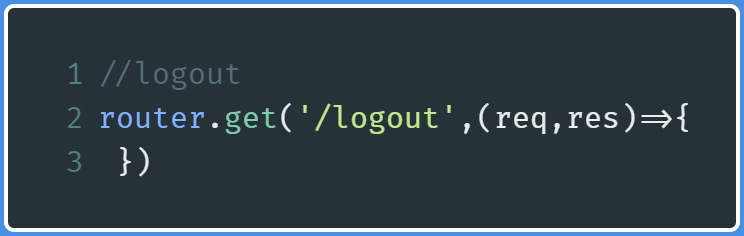
In this handler, write the post-obit code:
            req.logout();
req.flash('success_msg','At present logged out');
res.redirect('/users/login');
The req.logout function is created by Passport. As the name suggests, it logs out the user session. Later on, you send a success flash bulletin so redirect the user to the login folio.
This volition exist the output of the code:
All the same, if you now become to localhost:3000/dashboard, you lot're greeted with a server error. At present let's handle this.
Forestall access to dashboard when logged out
Go to config and create a file called auth.js.
In /config/auth.js add:
module.exports = {
ensureAuthenticated : function(req,res,adjacent) {
if(req.isAuthenticated()) {
return next();
}
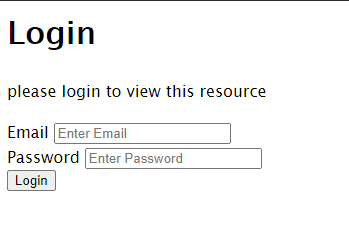
req.wink('error_msg' , 'please login to view this resources');
res.redirect('/users/login');
}
} This creates a role called ensureAuthenticated, which will ensure that a user has logged in (req.isAuthenticated()). If so, it moves on to the next middleware. If non, it throws an error and redirects the user to the login folio again.
Now, go to /routes/index.js and import this function:
const {ensureAuthenticated} = require("../config/auth.js") Find the following lawmaking:
Now modify the router.become function like and then:

You've now indicated that you want to utilize this function as middleware in this directory.
The code will output the following. Click on Logout:
And so become to localhost:3000/dashboard

Source: https://betterprogramming.pub/build-a-login-system-in-node-js-f1ba2abd19a
Posted by: haaghictir.blogspot.com
0 Response to "How To Make An Encrypted Login And Register System In Js"
Post a Comment